
Ripgrep
- 72 installs
- 36 repo stars
- Updated July 14, 2026
- oimiragieo/agent-studio
Helps with ai & agent building tasks.
About
ripgrep is a Claude Code skill for ai & agent building. It helps solo builders move faster with AI-assisted development.
- ripgrep
- AI & Agent Building
- AI-coding skill
Ripgrep by the numbers
- 72 all-time installs (skills.sh)
- +1 installs in the week ending Aug 4, 2026 (Skillselion tracking)
- Ranked #5,635 of 16,546 AI & Agent Building skills by installs in the Skillselion catalog
- Data as of Aug 4, 2026 (Skillselion catalog sync)
npx skills add https://github.com/oimiragieo/agent-studio --skill ripgrepAdd your badge
Show developers this skill is listed on Skillselion. Paste this into your README.

| Installs | 72 |
|---|---|
| repo stars | ★ 36 |
| Last updated | July 14, 2026 |
| Repository | oimiragieo/agent-studio ↗ |
What it does
Helps with ai & agent building tasks.
Files
Ripgrep Skill
<identity> Enhanced code search with ripgrep binary. NOTE: Prefer pnpm search:code for discovery/ranking and smaller output payloads; prefer raw rg for fastest exact literal matching. </identity>
<capabilities>
- Hybrid code search via
pnpm search:code(BM25 text + semantic vector ranking) - Raw ripgrep for exhaustive pattern sweeps (every match, not ranked top-N)
- Advanced regex patterns (PCRE2 with -P flag)
- Custom file type definitions via .ripgreprc
- Integration with .gitignore and custom ignore patterns
</capabilities>
⚡ RECOMMENDED: Hybrid Code Search
Use the hybrid search system for day-to-day code discovery:
- Text search works instantly with no setup (ripgrep-based BM25)
- Semantic search requires a one-time index build:
pnpm code:index:reindex(~12 min with GPU, ~17 min CPU) - GPU-accelerated embedding via fastembed (NVIDIA CUDA auto-detected)
- Memory-safe: embeddings run in isolated subprocess to work around ONNX Runtime memory leak
- Hybrid scoring: Reciprocal Rank Fusion (RRF) combines text matches + semantic similarity
Prerequisites
# Build the semantic index (one-time, or after major codebase changes)
pnpm code:index:reindex

# Verify .env has embeddings enabled (should be default)
# HYBRID_EMBEDDINGS=on
# LANCEDB_EMBEDDING_MODE=fastembed
Without the index build, pnpm search:code falls back to text-only matching. Concept queries like "authentication flow" will return poor results without embeddings.
Search Commands
# Project structure (directory tree + entry points + dependency graph + Mermaid)
pnpm search:structure

# Token budget analysis (file sizes + token estimates + refactor advice)
pnpm search:tokens .claude/lib          # directory analysis
pnpm search:tokens path/to/file.cjs     # single file analysis

# Semantic + text hybrid search (concept discovery, ranked results)
# Repeated/similar queries served from cache (~5ms hit vs ~800ms miss)
pnpm search:code "authentication logic"
pnpm search:code "export class User"

# One-shot search + compress + dedup pipeline (for large context tasks)
pnpm search:compress "how does routing work"

# Get file content with line numbers
pnpm search:file src/auth.ts 1 50

# Cache observability (daemon must be running)
pnpm search:code --cache-stats          # view hits, misses, entries
pnpm search:code --cache-clear          # flush cached results
pnpm search:structure — Know Where Things Are
Run this FIRST before any edit, refactor, or onboarding task. It gives a complete map:
1. Directory Tree — folder hierarchy up to 3 levels deep (excludes node_modules, .git) 2. Entry Points — all ESM export and CJS module.exports declarations with file:line references 3. Top Dependencies — most-imported modules (both import and require) with counts, split by:
📦External packages (node:test, path, fs, child_process)📁Local modules (which internal files are imported most — these are the architectural hotspots)
4. Mermaid Diagram — visual dependency graph with:
- Directory subgraphs showing export counts per folder
- External dependency subgraph
- Most-imported local modules highlighted as hub nodes
How agents should use this:
- Before editing: run
pnpm search:structureto find which directory owns the code you need to change - To find hotspots: the
📁local dependencies with highest counts are the most-connected modules — changes there have the widest blast radius - To find entry points: the exports list shows which files expose public APIs — start reading there
- To understand architecture: the Mermaid diagram shows which directories are most interconnected
- Before refactoring: the dependency counts tell you how many files will be affected by a rename/move
pnpm search:tokens [path] — Know What Fits in Context
Run this before deciding HOW to read a file or directory. It tells you:
- Token estimates per file and per directory (~4 chars per token)
- Actionable advice on whether to Read directly, use offset/limit, or use search:code instead
- Largest files that need special handling
- Directory rankings by token size — prioritize which subdirs to explore
# Check a specific file
pnpm search:tokens .claude/lib/memory/lancedb-client-impl.cjs
# Output: Size: 41.1KB | Tokens: ~10.5K | Advice: △ MEDIUM — use Read with offset/limit

# Check a directory
pnpm search:tokens .claude/lib
# Output: 333 files, 2.0MB, ~527K tokens (too large to read all — use search:code)

# Check the whole project
pnpm search:tokens .
# Output: 12478 files, 61MB, ~16M tokens with per-directory breakdown
Token Budget Legend:
✓ OK(<8K tokens) — safe toReadthe entire file△ MEDIUM(8-32K) — useReadwithoffset/limitparameters, orsearch:file⚠ LARGE(32-100K) — prefersearch:codeover full Read; only read targeted sections⚠ OVER(>100K) — MUST usesearch:codeor invokecontext-compressorskill
When to invoke `context-compressor`:
- Directory total exceeds 100K tokens and you need to understand the whole subsystem
- File exceeds 32K tokens and you need a summary rather than specific lines
- You're building a prompt that would exceed context window limits
Refactor recommendations — for source code files >15K tokens, the tool recommends splitting:
pnpm search:tokens .claude/hooks/routing
# Output includes:
#   ✂ REFACTOR RECOMMENDED: user-prompt-unified.core.cjs (18.2K tokens)
#     Split into ~3 modules of ~8K tokens each:
#       user-prompt-unified.cjs          — thin facade (re-exports)
#       user-prompt-unified-impl.cjs     — main logic
#       user-prompt-unified-helpers.cjs  — extracted helpers
This only applies to source code files (.js, .cjs, .mjs, .ts, .py), not data files or configs. The pattern follows existing splits in the codebase (e.g., routing-table.cjs → routing-table-data.cjs, index-manager.cjs → index-manager-operations.cjs).
pnpm search:compress "query" — Search + Compress in One Shot
Use when `search:tokens` shows a topic spans >32K tokens and you need a compressed summary.
Combines the full pipeline in a single command:
1. Hybrid search finds relevant files for your query 2. Reads actual file content (not just file paths) 3. Adaptively sets compression ratio based on corpus size (0.8 for small, 0.1 for huge) 4. Compresses via the Python engine with evidence-aware mode 5. Deduplicates extracted insights against existing memory (patterns.json, gotchas.json) 6. Outputs JSON with compressed context + classified memory records
pnpm search:compress "how does the routing system work"
# Returns JSON:
# {
#   "ok": true,
#   "search": { "query": "...", "hits": 20 },
#   "compression": { "mode": "evidence_aware", "skeletonRatio": 0.5 },
#   "memoryRecords": { "patterns": [...], "gotchas": [...], "issues": [...], "decisions": [...] },
#   "dedupStats": { "total": 24, "kept": 18, "filtered": 6 }
# }
Key features:
- Adaptive compression: small corpus (< 8K tokens) keeps 80%, huge corpus (>100K) keeps only 10%
- Memory dedup: won't re-persist patterns/gotchas that already exist in your memory system
- Evidence gating: use
--fail-on-insufficient-evidenceto abort if the query doesn't find strong matches
Automatic Optimizations (No Action Needed)
These features work in the background with no commands required:
Query Cache — Repeated or semantically similar search:code queries are served from an in-memory cache (~5ms vs ~800ms). The cache uses cosine similarity (threshold: 0.95) so "routing system" and "how routing works" share cached results. Entries expire after 5 minutes. The cache lives in the daemon process for persistence across queries.
BM25 Auto-Update — When you edit a file, the BM25 text index updates incrementally (~10ms per file). This means search:code always reflects your latest changes without needing code:index:reindex. Only the text index updates; semantic embeddings require a full reindex.
Cache observability:
pnpm search:code --cache-stats    # entries, hits, misses, hit rate
pnpm search:code --cache-clear    # flush all cached results
Search Mode Contract (Deterministic)
| Mode | Use when | Latency | Output |
|---|---|---|---|
pnpm search:structure | First step: understand project layout, find where to edit | Fast | Directory tree + exports + deps + Mermaid |
pnpm search:tokens [path] | Before reading: check if file/dir fits in context | Fast | Token estimates + refactor advice |
pnpm search:code "query" | Concept discovery, find unknown paths. Auto-cached (~5ms repeat) | ~0.2-0.8s (first), ~5ms (cached) | Compact ranked top-20 |
pnpm search:compress "query" | Large context: search + compress + dedup in one shot | ~2-5s | JSON: compressed context + memory records |
rg -F "literal" | Exact symbol/literal lookup and anchor checks before edits | Fastest (~35ms) | ALL matches (not ranked) |
Grep (built-in) | Exhaustive pattern sweeps for audits | Fast | ALL matches with context |
Required selection behavior:
- FIRST:
pnpm search:structureto orient — know the directory layout and dependency hotspots. - CHECK SIZE:
pnpm search:tokensbefore reading — know if the file fits in context. - THEN:
pnpm search:codefor concept discovery — find files related to your task. Repeat queries are cached automatically. - FOR LARGE CONTEXT:
pnpm search:compresswhen you need compressed understanding of a broad topic. Combines search + adaptive compression + memory dedup in one command. - BEFORE EDITS:
rg -Fto validate exact anchors — confirm the symbol/function exists where you think. - FOR AUDITS:
Grep(built-in) for exhaustive sweeps — need ALL matches, not top-N. - BM25 text index auto-updates when files are edited (no manual action needed).
fzfstays optional for human-in-the-loop workflows; do not require it for automation.
Locate Before You Edit (MANDATORY workflow for agents)
Before writing or editing ANY file, agents must locate it first. Blind edits waste tokens and cause errors.
Step 1 — Orient (run once per task):
pnpm search:structureRead the output to understand:
- Which directories exist and what they contain
- Which modules are most-imported (
📁local deps with high counts) - Where the public APIs are (Entry Points list)
Step 2 — Check token budget (before reading files):
# Is this file safe to Read in full, or do I need search:code?
pnpm search:tokens .claude/lib/memory/lancedb-client-impl.cjs
# Output: △ MEDIUM (10.5K tokens) — use Read with offset/limit

# How big is this directory? Can I read all files?
pnpm search:tokens .claude/lib/routing
# If >32K total → use search:code for discovery, don't try to read everything
Step 3 — Discover (per subtask):
# Find files related to your task concept
pnpm search:code "hook validation pre-tool"
This returns ranked files most relevant to the concept. Note the file paths.
Step 4 — Pinpoint (before each edit):
# Confirm exact symbol location with line numbers
rg -F "validateHookInput" -g "*.cjs" -n

# Read the file to understand context (use offset/limit for MEDIUM+ files)
pnpm search:file .claude/lib/utils/hook-input.cjs 1 50
Step 5 — Check blast radius (before refactors):
# How many files import the module you're about to change?
rg -F "hook-input.cjs" -g "*.cjs" -c
# If 40+ files import it, consider backward-compatible changes
This workflow prevents:
- Wasting tokens on files too large for context (check tokens first)
- Editing the wrong file (there may be similarly-named files in different directories)
- Missing callsites during refactors (rg -c shows exact counts)
- Breaking high-import modules without knowing the blast radius
- Triggering context compression unnecessarily (know sizes upfront)
Interactive Narrowing with fzf (Operator UX)
When result sets are large, use fzf to interactively narrow rg/rga output.
# rg + fzf + file preview
rg --line-number --no-heading --color=always "auth|token|session" . \
  | fzf --ansi --delimiter ":" \
    --preview "bat --color=always --style=numbers --highlight-line {2} {1}"

# rga (documents/archives) + fzf
rga --line-number --no-heading --color=always "invoice|receipt|policy" . \
  | fzf --ansi --delimiter ":" \
    --preview "bat --color=always --style=numbers --line-range=:300 {1}"
Advanced interactive ripgrep launcher pattern:
: | rg_prefix='rg --column --line-number --no-heading --color=always --smart-case' \
  fzf --ansi --disabled \
      --bind 'start:reload:$rg_prefix ""' \
      --bind 'change:reload:$rg_prefix {q} || true'
Usage contract:
- Use
fzffor operator selection/narrowing, not as a replacement for search backends. - Keep
pnpm search:codeas default for agent discovery/ranking workflows. - Use
rg/rga+fzffor interactive triage and manual result picking.
Structural + interactive workflow (human triage):
# Structural candidates (ast-grep)
ast-grep -p 'function $NAME($$$) { $$$ }' --lang javascript --files-with-matches .

# Narrow candidates interactively
ast-grep -p 'function $NAME($$$) { $$$ }' --lang javascript --files-with-matches . \
  | fzf --ansi --delimiter ":" \
    --preview "bat --color=always --style=numbers --line-range=:220 {}"
How It Works
1. pnpm code:index:reindex builds BM25 text index + LanceDB vector embeddings 2. Embedding generation runs in an isolated subprocess (GPU-accelerated when available) 3. Subprocess is restarted every 50 batches to reclaim ONNX native memory leaks 4. search:code checks the query cache first (~5ms hit); on miss, queries BM25 + vector indexes 5. RRF merges text and semantic rankings into a single ordered result set 6. Results are cached for future similar queries (cosine > 0.95 = cache hit) 7. Post-edit hooks incrementally update the BM25 text index (~10ms per file) 8. search:compress combines search + adaptive compression + memory dedup in one pipeline
Configuration
# Semantic search (default: on after running code:index:reindex)
HYBRID_EMBEDDINGS=on

# Embedding engine (fastembed recommended for speed + GPU support)
LANCEDB_EMBEDDING_MODE=fastembed

# Subprocess isolation for ONNX memory safety (default: on)
EMBED_SUBPROCESS=on

# Query cache (auto-caches repeated/similar queries)
SEARCH_CACHE_ENABLED=on            # Kill switch: set to off to disable
SEARCH_CACHE_TTL_MS=300000          # Cache TTL: 5 minutes
SEARCH_CACHE_SIMILARITY=0.95        # Cosine threshold for semantic cache hit

# BM25 incremental update after file edits
BM25_INCREMENTAL_UPDATE=on          # Kill switch: set to off to disable

# Disable semantic search (text-only, fastest, no index needed)
# HYBRID_EMBEDDINGS=off

# Daemon transport for repeated queries (cache lives here)
HYBRID_SEARCH_DAEMON=on
HYBRID_DAEMON_PREWARM=true
HYBRID_DAEMON_IDLE_MS=600000

# Query cache (caches repeated/similar queries by embedding similarity)
SEARCH_CACHE_ENABLED=on          # set to off to disable
SEARCH_CACHE_TTL_MS=300000       # cache entry TTL (5 min)
SEARCH_CACHE_SIMILARITY=0.95     # cosine threshold for cache hit

# BM25 incremental update after file edits
BM25_INCREMENTAL_UPDATE=on       # set to off to disable
Daemon + Prewarm Runbook
# Start, verify, prewarm
pnpm search:daemon:start
pnpm search:daemon:status
pnpm search:daemon:prewarm

# Search (daemon path)
pnpm search:code "authentication logic"

# Stop daemon
pnpm search:daemon:stop
Expected latency profile on this repository:
- Cold daemon first query (no prewarm): ~1.35s avg
- First query after prewarm: ~0.40s avg
- Warm repeated daemon queries: ~0.18-0.19s
- Direct mode (
HYBRID_SEARCH_DAEMON=off): ~0.73s avg for repeated CLI calls
Index Build Performance
| Metric | With GPU (RTX 4070) | CPU-only |
|---|---|---|
| Index time (2843 files) | ~12 min | ~17 min |
| Main process memory | ~200MB | ~200MB |
| Subprocess memory (isolated) | ~500MB | ~300MB |
| Heap allocation needed | 4GB | 4GB |
| Index size on disk | ~6MB (BM25) + ~10MB (vectors) | Same |
Measured Performance and Output (This Repo)
Using the same 5 queries on this repository:
| Mode | Avg Latency | Avg Output Bytes | Best Use Case |
|---|---|---|---|
pnpm search:code (HYBRID_EMBEDDINGS=off) | ~227ms | ~461 bytes | Fast discovery with compact output |
pnpm search:code (HYBRID_EMBEDDINGS=on) | ~734ms | ~512 bytes | Semantic/concept queries |
Raw rg literal search | ~35ms | ~2478 bytes | Exact symbol/literal lookup |
Interpretation:
- Raw
rgis fastest for exact literal/symbol lookups - Hybrid search returns significantly smaller output payloads (often lower token pressure)
- Embeddings improve semantic recall, but add latency
Decision Rule (Practical)
Use pnpm search:code when:
- Query is conceptual/natural language (
"auth flow for refresh tokens") - You need ranked results and concise context for agent prompts
- You want lower output volume by default
Use raw rg when:
- Query is an exact symbol/literal (
TaskUpdate(,HybridLazyIndexer, exact export names) - You need the fastest possible lookup time
- You need advanced regex/PCRE2 behavior
Measured by File Size (This Repo)
Sample size: 4 small files (0.5-5KB), 4 large files (30-109KB), literal token queries.
| Bucket | search:code off | search:code on | rg_repo | rg_file |
|---|---|---|---|---|
| Small files | ~230ms / ~2707B | ~600ms / ~2965B | ~34ms / ~17075B | ~15ms / ~1156B |
| Large files | ~228ms / ~2354B | ~475ms / ~2847B | ~35ms / ~17811B | ~15ms / ~6564B |
Takeaways:
rg_fileis fastest and best for targeted file-level checks.rg_reporemains fastest for repo-wide literal scans, but emits much larger output payloads.search:codehas steadier latency across file sizes and typically lower output volume for prompt usage.
Real-World Scenario Playbook (Tested Patterns)
Use these scenario patterns to choose the right search path quickly.
Scenario 1: Incident Triage (Unknown Root Cause)
Goal: find likely hotspots for a production symptom quickly without flooding context.
# 1) Start broad and semantic
pnpm search:code "task status not updating after completion"

# 2) Pivot to exact symbol checks once candidates appear
pnpm search:code "TaskUpdate("
Pattern:
- Start with
search:codefor intent-level recall. - Narrow with literal/symbol queries once candidate files are identified.
Scenario 2: Fast Exact Lookup (You Know the Identifier)
Goal: locate exact definitions/usages as fast as possible.
# Repo-wide exact literal (stable example in this repo)
rg -F "TaskUpdate(" -g "*.cjs" -g "*.js" -g "*.ts" .

# Single-file exact lookup (fastest path)
rg -F "spawnSync" .claude/skills/skill-creator/scripts/create.cjs
Pattern:
- Use raw
rg -Ffor exact symbol searches, especially for large files or known paths.
Scenario 3: Safe Refactor Prep
Goal: enumerate callsites and assess blast radius before renaming or behavior changes.
# 1) Check blast radius — how many files import this module?
pnpm search:structure
# Look at 📁 local deps: "📁 router-state (22)" = 22 files affected by changes

# 2) Gather broad callsites with semantic search
pnpm search:code "TaskUpdate completed status workflow"

# 3) Get EXACT callsite inventory (every match, not ranked)
rg -F "TaskUpdate(" -g "*.cjs" -g "*.js" -g "*.ts" -c
# Shows count per file — plan your edits across all files

# 4) Verify the specific lines before editing
rg -F "TaskUpdate(" -g "*.cjs" -n -C 2
Pattern:
search:structurefirst to check dependency counts (blast radius).- Hybrid search to find semantic variants you might miss.
- Raw
rg -cfor exact callsite count per file. - Raw
rg -n -C 2for line numbers + context before making edits.
Scenario 4: Security Audit Sweep
Goal: detect risky patterns and confirm exact high-confidence matches.
For exhaustive sweeps (auditing), use `rg` or `Grep` (built-in) as primary tool. Hybrid search returns ranked top-N results, which is great for discovery but can miss matches. Security audits need ALL instances of a pattern, not a ranked sample.
# EXHAUSTIVE sweep first (every match, not ranked)
rg -F "shell: true" -g "*.cjs" -g "*.js" -g "*.mjs"
rg -F "JSON.parse(" -g "*.cjs" -g "*.js" --no-heading
rg "eval\(|new Function\(" -g "*.cjs" -g "*.js"
rg -F "child_process" -g "*.cjs" -g "*.js"

# THEN use hybrid for concept discovery (find patterns you didn't think to grep for)
pnpm search:code "command injection shell execution security"
pnpm search:code "prototype pollution unsafe parsing"

# Verify specific findings with file-level rg
rg -F "exec(" .claude/lib/tools/standard-tools.cjs
Pattern:
rg/Grepfor exhaustive sweeps where completeness matters (security, compliance).- Hybrid search for concept discovery to find patterns you didn't know to grep for.
- Never rely solely on hybrid top-N results for security claims.
Scenario 5: Architecture Onboarding (New Contributor/Agent)
Goal: understand structure and know where to make changes.
# 1) Get the full project map (directory tree + exports + deps + Mermaid)
pnpm search:structure

# From the output, you'll see:
#   - Directory tree: which folders exist and their nesting
#   - Entry points: which files export APIs (with file:line)
#   - Top dependencies: most-imported local modules (📁) = architectural hotspots
#     e.g. "📁 memory-manager.cjs (56)" means 56 files import it — high blast radius
#   - Mermaid diagram: visual module graph

# 2) Drill into subsystems by concept
pnpm search:code "routing guard task lifecycle"
pnpm search:code "memory scheduler session context"

# 3) Once you find candidate files, read them
pnpm search:file .claude/lib/routing/router-state.cjs 1 50

# 4) Before editing, confirm exact locations with rg
rg -F "resetToRouterMode" -g "*.cjs" -n
Pattern:
search:structurefirst — know the landscape before touching anything.- Look at
📁local dependencies with highest counts — those are the modules where changes have the widest impact. - Use
search:codeto find files related to your concept. - Use
search:fileto read specific files with line numbers. - Use
rg -Fto confirm exact symbol locations before editing.
Scenario 6: Codebase Audit / Deep Dive
Goal: systematic audit of a codebase for bugs, security issues, and dead code.
# 1) Map the project — identify architectural hotspots FIRST
pnpm search:structure
# Key things to note from the output:
#   - 📁 local deps with high counts = audit priority (most connected = most risk)
#   - Entry points list = public API surface to review
#   - Directory tree = scope of what needs auditing

# 2) Exhaustive pattern sweeps with rg (need ALL matches, not top-N)
rg -F "JSON.parse(" -g "*.cjs" -g "*.js" --no-heading
rg -F "shell: true" -g "*.cjs" -g "*.js"
rg "eval\(|new Function\(" -g "*.cjs" -g "*.js"
rg "DEPRECATED|LEGACY|WARN" -g "*.cjs" -g "*.js" -g "*.mjs"
rg -F "catch" -A1 -g "*.cjs" | rg "^\s*\}"  # empty catch blocks

# 3) Concept discovery for patterns you didn't think to grep
pnpm search:code "prototype pollution unsafe parsing"
pnpm search:code "race condition concurrent file write"
pnpm search:code "hardcoded secret credential password"

# 4) Cross-reference: find what calls a specific module
pnpm search:code "routing-table-intent"
rg -F "standard-tools" -g "*.cjs" -c  # exact import count per file

# 5) Check for dead code: find exports that are never imported
# Compare entry points from search:structure against rg import counts
rg -F "orchestrator-tool.cjs" -g "*.cjs" -c  # 0 results = dead module
Pattern:
search:structurefirst to identify hotspots (high-import modules = audit priority).rg/Grepfor exhaustive sweeps (security, dead code, pattern matching).search:codefor concept discovery (find things you didn't know to grep for).- Cross-reference
search:structureentry points againstrgimport counts to find dead code. - Never rely solely on hybrid search for audit completeness; it returns ranked top-N, not all matches.
Scenario 7: Token-Constrained Agent Workflow
Goal: minimize prompt/context bloat while maintaining retrieval quality.
# Default: semantic search on (compact ranked output, good for agents)
pnpm search:code "workflow task completion guard"

# For fastest possible response when you know exact terms
HYBRID_EMBEDDINGS=off pnpm search:code "TaskUpdate completed"

# For intent-heavy queries where exact terms are unknown
pnpm search:code "why does the task get stuck after agent finishes"
Pattern:
- Default to
HYBRID_EMBEDDINGS=on(compact ranked output is already token-efficient). - Use
HYBRID_EMBEDDINGS=offoverride only when exact keyword match is sufficient and speed is critical. - Hybrid search output is typically smaller than raw
rgoutput (ranked top-N vs all matches).
Reusable Query Patterns
- Concept query:
"authentication flow refresh token validation" - Mixed query:
"TaskUpdate completed status" - Exact query:
"TaskUpdate("(preferrg -Fwhen speed is critical) - Structure query: use
pnpm search:structurebefore large edits - File drill-down:
pnpm search:file <path> <startLine> <endLine>
Only use raw ripgrep (below) for:
- Advanced PCRE2 regex patterns (lookahead/lookbehind)
- Custom file type filtering not supported by
search:code - Pipeline integration with other CLI tools
<instructions> <execution_process>
Overview
This skill provides access to ripgrep (rg) via the @vscode/ripgrep npm package, which automatically downloads the correct binary for your platform (Windows, Linux, macOS). Enhanced file type support for modern JavaScript/TypeScript projects.
Binary Source: @vscode/ripgrep npm package (cross-platform, auto-installed)
- Automatically handles Windows, Linux, macOS binaries
- No manual binary management required
Optional Config: bin/.ripgreprc (if present, automatically used)
When to Use What
| Tool | Best for | Tradeoff |
|---|---|---|
pnpm search:code | Concept discovery, ranked results, agent workflows | Top-N ranked, not exhaustive; needs index for semantic |
Built-in Grep tool | Exhaustive pattern sweeps, audits, exact counts | Returns ALL matches; higher token output |
Raw rg via Bash | PCRE2 regex, pipeline integration, .ripgreprc types | Requires Bash tool; larger raw output |
Built-in Glob tool | Finding files by name pattern | No content search |
For audits and security sweeps: prefer Grep (built-in) — it returns every match, not ranked top-N. You need completeness, not ranking.
For discovery and onboarding: prefer pnpm search:code — compact ranked output, semantic understanding, low token pressure.
For exact symbol lookups before edits: prefer raw rg -F — fastest possible, deterministic.
Quick Start Commands
Basic Search
# Search for pattern in all files
node .claude/skills/ripgrep/scripts/search.mjs "pattern"

# Search specific file types
node .claude/skills/ripgrep/scripts/search.mjs "pattern" -tjs
node .claude/skills/ripgrep/scripts/search.mjs "pattern" -tts

# Case-insensitive search
node .claude/skills/ripgrep/scripts/search.mjs "pattern" -i

# Search with context lines
node .claude/skills/ripgrep/scripts/search.mjs "pattern" -C 3
Quick Search Presets
# Search JavaScript files (includes .mjs, .cjs)
node .claude/skills/ripgrep/scripts/quick-search.mjs js "pattern"

# Search TypeScript files (includes .mts, .cts)
node .claude/skills/ripgrep/scripts/quick-search.mjs ts "pattern"

# Search all .mjs files specifically
node .claude/skills/ripgrep/scripts/quick-search.mjs mjs "pattern"

# Search .claude directory for hooks
node .claude/skills/ripgrep/scripts/quick-search.mjs hooks "pattern"

# Search .claude directory for skills
node .claude/skills/ripgrep/scripts/quick-search.mjs skills "pattern"

# Search .claude directory for tools
node .claude/skills/ripgrep/scripts/quick-search.mjs tools "pattern"

# Search .claude directory for agents
node .claude/skills/ripgrep/scripts/quick-search.mjs agents "pattern"

# Search all files (no filter)
node .claude/skills/ripgrep/scripts/quick-search.mjs all "pattern"
Common Patterns
File Type Searches
# JavaScript files (includes .js, .mjs, .cjs)
rg "function" -tjs

# TypeScript files (includes .ts, .mts, .cts)
rg "interface" -tts

# Config files (.yaml, .yml, .toml, .ini)
rg "port" -tconfig

# Markdown files (includes .md, .mdc)
rg "# Heading" -tmd
Advanced Regex
# Word boundary search
rg "\bfoo\b"

# Case-insensitive
rg "pattern" -i

# Smart case (case-insensitive unless uppercase present)
rg "pattern" -S  # Already default in .ripgreprc

# Multiline search
rg "pattern.*\n.*another" -U

# PCRE2 lookahead/lookbehind
rg -P "foo(?=bar)"        # Positive lookahead
rg -P "foo(?!bar)"        # Negative lookahead
rg -P "(?<=foo)bar"       # Positive lookbehind
rg -P "(?<!foo)bar"       # Negative lookbehind
Filtering
# Exclude directories
rg "pattern" -g "!node_modules/**"
rg "pattern" -g "!.git/**"

# Include only specific directories
rg "pattern" -g ".claude/**"

# Exclude specific file types
rg "pattern" -Tjs  # Exclude JavaScript

# Search hidden files
rg "pattern" --hidden

# Search binary files
rg "pattern" -a
Context and Output
# Show 3 lines before and after match
rg "pattern" -C 3

# Show 2 lines before
rg "pattern" -B 2

# Show 2 lines after
rg "pattern" -A 2

# Show only filenames with matches
rg "pattern" -l

# Show count of matches per file
rg "pattern" -c

# Show line numbers (default in .ripgreprc)
rg "pattern" -n
PCRE2 Advanced Patterns
Enable PCRE2 mode with -P for advanced features:
Lookahead and Lookbehind
# Find "error" only when followed by "critical"
rg -P "error(?=.*critical)"

# Find "test" not followed by ".skip"
rg -P "test(?!\.skip)"

# Find words starting with capital after "Dr. "
rg -P "(?<=Dr\. )[A-Z]\w+"

# Find function calls not preceded by "await "
rg -P "(?<!await )\b\w+\("
Backreferences
# Find repeated words
rg -P "\b(\w+)\s+\1\b"

# Find matching HTML tags
rg -P "<(\w+)>.*?</\1>"
Conditionals
# Match IPv4 or IPv6
rg -P "(\d{1,3}\.){3}\d{1,3}|([0-9a-fA-F]{1,4}:){7}[0-9a-fA-F]{1,4}"
Integration with Other Tools
With fzf (Interactive Search)
# Search and interactively select file
rg --files | fzf

# Search pattern and open in editor
rg "pattern" -l | fzf | xargs code
With vim
# Set ripgrep as grep program in .vimrc
set grepprg=rg\ --vimgrep\ --smart-case\ --follow
Pipeline with Other Commands
# Search and count unique matches
rg "pattern" -o | sort | uniq -c

# Search and replace preview
rg "old" -l | xargs sed -i 's/old/new/g'
Performance Optimization
Tips for Large Codebases
1. Use file type filters: -tjs is faster than searching all files 2. Exclude large directories: -g "!node_modules/**" 3. Use literal strings when possible: -F "literal" (disables regex) 4. Enable parallel search: Ripgrep uses all cores by default 5. Use .gitignore: Ripgrep respects .gitignore automatically
Benchmarks
Ripgrep is typically:
- 10-100x faster than grep
- 5-10x faster than ag (The Silver Searcher)
- 3-5x faster than git grep
Custom Configuration
The optional .ripgreprc file at bin/.ripgreprc (if present) contains:
# Extended file types
--type-add=js:*.mjs
--type-add=js:*.cjs
--type-add=ts:*.mts
--type-add=ts:*.cts
--type-add=md:*.mdc
--type-add=config:*.yaml
--type-add=config:*.yml
--type-add=config:*.toml
--type-add=config:*.ini

# Default options
--smart-case
--follow
--line-number
Framework-Specific Patterns
Searching .claude Directory
# Find all hooks
rg "PreToolUse\|PostToolUse" .claude/hooks/

# Find all skills
rg "^# " .claude/skills/ -tmd

# Find agent definitions
rg "^name:" .claude/agents/ -tmd

# Find workflow steps
rg "^### Step" .claude/workflows/ -tmd
Common Agent Studio Searches
# Find all TaskUpdate calls
rg "TaskUpdate\(" -tjs -tts

# Find all skill invocations
rg "Skill\(\{" -tjs -tts

# Find all memory protocol sections
rg "## Memory Protocol" -tmd

# Find all BLOCKING enforcement comments
rg "BLOCKING|CRITICAL" -C 2
</execution_process>
<best_practices>
1. Use file type filters (-tjs, -tts) for faster searches 2. Respect .gitignore patterns (automatic by default) 3. Use smart-case for case-insensitive search (default in config) 4. Enable PCRE2 (-P) only when advanced features needed 5. Exclude large directories with -g "!node_modules/**" 6. Use literal search (-F) when pattern has no regex 7. Binary automatically managed via @vscode/ripgrep npm package 8. Use quick-search presets for common .claude directory searches </best_practices> </instructions>
<examples> <usage_example> Search for all TaskUpdate calls in the project:
node .claude/skills/ripgrep/scripts/search.mjs "TaskUpdate" -tjs -ttsFind all security-related hooks:
node .claude/skills/ripgrep/scripts/quick-search.mjs hooks "security|SECURITY" -iSearch for function definitions with PCRE2:
node .claude/skills/ripgrep/scripts/search.mjs -P "^function\s+\w+\(" -tjs</usage_example> </examples>
Binary Management
The search scripts use @vscode/ripgrep npm package which automatically:
- Detects your platform (Windows, Linux, macOS)
- Downloads the correct binary during
pnpm install - Handles all architecture variants (x64, ARM64, etc.)
No manual binary management required - the npm package handles everything automatically.
Related Skills
- `grep` - Built-in Claude Code grep (simpler, less features)
- `glob` - File pattern matching
Iron Laws
1. ALWAYS run pnpm search:structure first to orient before any edit task — editing without understanding directory layout and import hotspots causes missed callsites and blast radius surprises. 2. NEVER use ranked/top-N hybrid search output for security audits — completeness matters for audits; use rg or built-in Grep to get every match, not a ranked sample. 3. ALWAYS validate exact symbol anchors with rg -F before editing code — editing based on semantic matches alone misses similarly-named functions and causes wrong-file edits. 4. NEVER make fzf a blocking dependency in automated or agent workflows — interactive selection is operator UX only; unattended agent flows must stay non-interactive and reproducible. 5. ALWAYS scope repo-wide searches with file type filters or path globs — unscoped searches flood context with irrelevant matches and inflate token costs.
Anti-Patterns
| Anti-Pattern | Why It Fails | Correct Approach |
|---|---|---|
Starting an edit task without running search:structure | Missing directory layout knowledge causes edits to the wrong file and missed callsites | Always run pnpm search:structure first to understand directory hierarchy and import hotspots |
| Using hybrid search for security audit completeness | Hybrid search returns ranked top-N, not all matches; security audits need every instance | Use rg/Grep (exhaustive) for security sweeps; use hybrid search only for concept discovery |
Editing code without confirming exact symbol location with rg -F | Semantic matches include similarly-named symbols; editing the wrong function is silent | Run rg -F "exact_symbol" to confirm location and callsite count before any code edit |
Making fzf a required step in agent automation pipelines | fzf requires interactive input; agents cannot proceed when the pipeline blocks on user selection | Keep fzf optional and operator-only; agent workflows must use deterministic rg/search:code |
| Running unscoped repo-wide regex searches | Large monorepos return thousands of matches; token costs spike and context floods | Always constrain scope with -g "*.cjs", -tjs, or a path argument before running repo-wide patterns |
Memory Protocol (MANDATORY)
Before starting: Read .claude/context/memory/learnings.md
After completing:
- New pattern ->
.claude/context/memory/learnings.md - Issue found ->
.claude/context/memory/issues.md - Decision made ->
.claude/context/memory/decisions.md
ASSUME INTERRUPTION: If it's not in memory, it didn't happen.
Invoke the ripgrep skill and follow it exactly as presented to you
'use strict';
/**
 * Post-execute hook for ripgrep
 * Auto-generated by enterprise-bundle-scaffolder
 *
 * Records metrics after skill execution.
 */

function postExecute(_context) {
  // Record execution metrics
  return { ok: true, skill: 'ripgrep' };
}

module.exports = { postExecute };
'use strict';
/**
 * Pre-execute hook for ripgrep
 * Auto-generated by enterprise-bundle-scaffolder
 *
 * Validates inputs before skill execution.
 */

function preExecute(context) {
  // Validate skill invocation context
  if (!context || typeof context !== 'object') {
    return { allow: true, message: 'ripgrep: no context to validate' };
  }
  return { allow: true };
}

module.exports = { preExecute };
# Ripgrep Configuration for LLM-RULES
# This file extends ripgrep's default type definitions

# Add .mjs (ES modules) to JavaScript type
--type-add=js:*.mjs

# Add .cjs (CommonJS modules) to JavaScript type
--type-add=js:*.cjs

# Add .mts and .cts for TypeScript module variants
--type-add=ts:*.mts
--type-add=ts:*.cts

# Add .mdc (Markdown with components) to markdown type
--type-add=md:*.mdc

# Add common config file extensions
--type-add=config:*.yaml
--type-add=config:*.yml
--type-add=config:*.toml
--type-add=config:*.ini

# Smart case by default (case-insensitive unless pattern has uppercase)
--smart-case

# Follow symbolic links
--follow

# Show line numbers by default
--line-number
User Guide
This guide is intended to give an elementary description of ripgrep and an overview of its capabilities. This guide assumes that ripgrep is installed and that readers have passing familiarity with using command line tools. This also assumes a Unix-like system, although most commands are probably easily translatable to any command line shell environment.
Table of Contents
- Basics
- Recursive search
- Automatic filtering
- Manual filtering: globs
- Manual filtering: file types
- Replacements
- Configuration file
- File encoding
- Binary data
- Preprocessor
- Common options
Basics
ripgrep is a command line tool that searches your files for patterns that you give it. ripgrep behaves as if reading each file line by line. If a line matches the pattern provided to ripgrep, then that line will be printed. If a line does not match the pattern, then the line is not printed.
The best way to see how this works is with an example. To show an example, we need something to search. Let's try searching ripgrep's source code. First grab a ripgrep source archive from https://github.com/BurntSushi/ripgrep/archive/0.7.1.zip and extract it:
$ curl -LO https://github.com/BurntSushi/ripgrep/archive/0.7.1.zip
$ unzip 0.7.1.zip
$ cd ripgrep-0.7.1
$ ls
benchsuite  grep       tests         Cargo.toml       LICENSE-MIT
ci          ignore     wincolor      CHANGELOG.md     README.md
complete    pkg        appveyor.yml  compile          snapcraft.yaml
doc         src        build.rs      COPYING          UNLICENSE
globset     termcolor  Cargo.lock    HomebrewFormula
Let's try our first search by looking for all occurrences of the word fast in README.md:
$ rg fast README.md
75:  faster than both. (N.B. It is not, strictly speaking, a "drop-in" replacement
88:  color and full Unicode support. Unlike GNU grep, `ripgrep` stays fast while
119:### Is it really faster than everything else?
124:Summarizing, `ripgrep` is fast because:
129: optimizations to make searching very fast.(Note: If you see an error message from ripgrep saying that it didn't search any files, then re-run ripgrep with the --debug flag. One likely cause of this is that you have a * rule in a $HOME/.gitignore file.)
So what happened here? ripgrep read the contents of README.md, and for each line that contained fast, ripgrep printed it to your terminal. ripgrep also included the line number for each line by default. If your terminal supports colors, then your output might actually look something like this screenshot:

In this example, we searched for something called a "literal" string. This means that our pattern was just some normal text that we asked ripgrep to find. But ripgrep supports the ability to specify patterns via regular expressions. As an example, what if we wanted to find all lines have a word that contains fast followed by some number of other letters?
$ rg 'fast\w+' README.md
75:  faster than both. (N.B. It is not, strictly speaking, a "drop-in" replacement
119:### Is it really faster than everything else?
In this example, we used the pattern fast\w+. This pattern tells ripgrep to look for any lines containing the letters fast followed by _one or more_ word-like characters. Namely, \w matches characters that compose words (like a and L but unlike . and ). The + after the \w means, "match the previous pattern one or more times." This means that the word fast won't match because there are no word characters following the final t. But a word like faster will. faste would also match!
Here's a different variation on this same theme:
$ rg 'fast\w*' README.md
75:  faster than both. (N.B. It is not, strictly speaking, a "drop-in" replacement
88:  color and full Unicode support. Unlike GNU grep, `ripgrep` stays fast while
119:### Is it really faster than everything else?
124:Summarizing, `ripgrep` is fast because:
129:  optimizations to make searching very fast.
In this case, we used fast\w* for our pattern instead of fast\w+. The * means that it should match _zero_ or more times. In this case, ripgrep will print the same lines as the pattern fast, but if your terminal supports colors, you'll notice that faster will be highlighted instead of just the fast prefix.
It is beyond the scope of this guide to provide a full tutorial on regular expressions, but ripgrep's specific syntax is documented here: https://docs.rs/regex/*/regex/#syntax
Recursive search
In the previous section, we showed how to use ripgrep to search a single file. In this section, we'll show how to use ripgrep to search an entire directory of files. In fact, _recursively_ searching your current working directory is the default mode of operation for ripgrep, which means doing this is very simple.
Using our unzipped archive of ripgrep source code, here's how to find all function definitions whose name is write:
$ rg 'fn write\('
src/printer.rs
469:    fn write(&mut self, buf: &[u8]) {

termcolor/src/lib.rs
227:    fn write(&mut self, b: &[u8]) -> io::Result<usize> {
250:    fn write(&mut self, b: &[u8]) -> io::Result<usize> {
428:    fn write(&mut self, b: &[u8]) -> io::Result<usize> { self.wtr.write(b) }
441:    fn write(&mut self, b: &[u8]) -> io::Result<usize> { self.wtr.write(b) }
454:    fn write(&mut self, buf: &[u8]) -> io::Result<usize> {
511:    fn write(&mut self, buf: &[u8]) -> io::Result<usize> {
848:    fn write(&mut self, buf: &[u8]) -> io::Result<usize> {
915:    fn write(&mut self, buf: &[u8]) -> io::Result<usize> {
949:    fn write(&mut self, buf: &[u8]) -> io::Result<usize> {
1114:    fn write(&mut self, buf: &[u8]) -> io::Result<usize> {
1348:    fn write(&mut self, buf: &[u8]) -> io::Result<usize> {
1353: fn write(&mut self, buf: &[u8]) -> io::Result<usize> {(Note: We escape the ( here because ( has special significance inside regular expressions. You could also use rg -F 'fn write(' to achieve the same thing, where -F interprets your pattern as a literal string instead of a regular expression.)
In this example, we didn't specify a file at all. Instead, ripgrep defaulted to searching your current directory in the absence of a path. In general, rg foo is equivalent to rg foo ./.
This particular search showed us results in both the src and termcolor directories. The src directory is the core ripgrep code where as termcolor is a dependency of ripgrep (and is used by other tools). What if we only wanted to search core ripgrep code? Well, that's easy, just specify the directory you want:
$ rg 'fn write\(' src
src/printer.rs
469:    fn write(&mut self, buf: &[u8]) {
Here, ripgrep limited its search to the src directory. Another way of doing this search would be to cd into the src directory and simply use rg 'fn write\(' again.
Automatic filtering
After recursive search, ripgrep's most important feature is what it _doesn't_ search. By default, when you search a directory, ripgrep will ignore all of the following:
1. Files and directories that match glob patterns in these three categories: 1. .gitignore globs (including global and repo-specific globs). This includes .gitignore files in parent directories that are part of the same git repository. (Unless the --no-require-git flag is given.) 2. .ignore globs, which take precedence over all gitignore globs when there's a conflict. This includes .ignore files in parent directories. 3. .rgignore globs, which take precedence over all .ignore globs when there's a conflict. This includes .rgignore files in parent directories. 2. Hidden files and directories. 3. Binary files. (ripgrep considers any file with a NUL byte to be binary.) 4. Symbolic links aren't followed.
All of these things can be toggled using various flags provided by ripgrep:
1. You can disable all ignore-related filtering with the --no-ignore flag. 2. Hidden files and directories can be searched with the --hidden (-. for short) flag. 3. Binary files can be searched via the --text (-a for short) flag. Be careful with this flag! Binary files may emit control characters to your terminal, which might cause strange behavior. 4. ripgrep can follow symlinks with the --follow (-L for short) flag.
As a special convenience, ripgrep also provides a flag called --unrestricted (-u for short). Repeated uses of this flag will cause ripgrep to disable more and more of its filtering. That is, -u will disable .gitignore handling, -uu will search hidden files and directories and -uuu will search binary files. This is useful when you're using ripgrep and you aren't sure whether its filtering is hiding results from you. Tacking on a couple -u flags is a quick way to find out. (Use the --debug flag if you're still perplexed, and if that doesn't help, file an issue.)
ripgrep's .gitignore handling actually goes a bit beyond just .gitignore files. ripgrep will also respect repository specific rules found in $GIT_DIR/info/exclude, as well as any global ignore rules in your core.excludesFile (which is usually $XDG_CONFIG_HOME/git/ignore on Unix-like systems).
Sometimes you want to search files that are in your .gitignore, so it is possible to specify additional ignore rules or overrides in a .ignore (application agnostic) or .rgignore (ripgrep specific) file.
For example, let's say you have a .gitignore file that looks like this:
log/This generally means that any log directory won't be tracked by git. However, perhaps it contains useful output that you'd like to include in your searches, but you still don't want to track it in git. You can achieve this by creating a .ignore file in the same directory as the .gitignore file with the following contents:
!log/ripgrep treats .ignore files with higher precedence than .gitignore files (and treats .rgignore files with higher precedence than .ignore files). This means ripgrep will see the !log/ whitelist rule first and search that directory.
Like .gitignore, a .ignore file can be placed in any directory. Its rules will be processed with respect to the directory it resides in, just like .gitignore.
To process .gitignore and .ignore files case insensitively, use the flag --ignore-file-case-insensitive. This is especially useful on case insensitive file systems like those on Windows and macOS. Note though that this can come with a significant performance penalty, and is therefore disabled by default.
For a more in depth description of how glob patterns in a .gitignore file are interpreted, please see man gitignore.
Manual filtering: globs
In the previous section, we talked about ripgrep's filtering that it does by default. It is "automatic" because it reacts to your environment. That is, it uses already existing .gitignore files to produce more relevant search results.
In addition to automatic filtering, ripgrep also provides more manual or ad hoc filtering. This comes in two varieties: additional glob patterns specified in your ripgrep commands and file type filtering. This section covers glob patterns while the next section covers file type filtering.
In our ripgrep source code (see Basics for instructions on how to get a source archive to search), let's say we wanted to see which things depend on clap, our argument parser.
We could do this:
$ rg clap
[lots of results]
But this shows us many things, and we're only interested in where we wrote clap as a dependency. Instead, we could limit ourselves to TOML files, which is how dependencies are communicated to Rust's build tool, Cargo:
$ rg clap -g '*.toml'
Cargo.toml
35:clap = "2.26"
51:clap = "2.26"
The -g '*.toml' syntax says, "make sure every file searched matches this glob pattern." Note that we put '*.toml' in single quotes to prevent our shell from expanding the *.
If we wanted, we could tell ripgrep to search anything _but_ *.toml files:
$ rg clap -g '!*.toml'
[lots of results]
This will give you a lot of results again as above, but they won't include files ending with .toml. Note that the use of a ! here to mean "negation" is a bit non-standard, but it was chosen to be consistent with how globs in .gitignore files are written. (Although, the meaning is reversed. In .gitignore files, a ! prefix means whitelist, and on the command line, a ! means blacklist.)
Globs are interpreted in exactly the same way as .gitignore patterns. That is, later globs will override earlier globs. For example, the following command will search only *.toml files:
$ rg clap -g '!*.toml' -g '*.toml'Interestingly, reversing the order of the globs in this case will match nothing, since the presence of at least one non-blacklist glob will institute a requirement that every file searched must match at least one glob. In this case, the blacklist glob takes precedence over the previous glob and prevents any file from being searched at all!
Manual filtering: file types
Over time, you might notice that you use the same glob patterns over and over. For example, you might find yourself doing a lot of searches where you only want to see results for Rust files:
$ rg 'fn run' -g '*.rs'Instead of writing out the glob every time, you can use ripgrep's support for file types:
$ rg 'fn run' --type rustor, more succinctly,
$ rg 'fn run' -trustThe way the --type flag functions is simple. It acts as a name that is assigned to one or more globs that match the relevant files. This lets you write a single type that might encompass a broad range of file extensions. For example, if you wanted to search C files, you'd have to check both C source files and C header files:
$ rg 'int main' -g '*.{c,h}'or you could just use the C file type:
$ rg 'int main' -tcJust as you can write blacklist globs, you can blacklist file types too:
$ rg clap --type-not rustor, more succinctly,
$ rg clap -TrustThat is, -t means "include files of this type" where as -T means "exclude files of this type."
To see the globs that make up a type, run rg --type-list:
$ rg --type-list | rg '^make:'
make: *.mak, *.mk, GNUmakefile, Gnumakefile, Makefile, gnumakefile, makefile
By default, ripgrep comes with a bunch of pre-defined types. Generally, these types correspond to well known public formats. But you can define your own types as well. For example, perhaps you frequently search "web" files, which consist of JavaScript, HTML and CSS:
$ rg --type-add 'web:*.html' --type-add 'web:*.css' --type-add 'web:*.js' -tweb titleor, more succinctly,
$ rg --type-add 'web:*.{html,css,js}' -tweb titleThe above command defines a new type, web, corresponding to the glob *.{html,css,js}. It then applies the new filter with -tweb and searches for the pattern title. If you ran
$ rg --type-add 'web:*.{html,css,js}' --type-listThen you would see your web type show up in the list, even though it is not part of ripgrep's built-in types.
It is important to stress here that the --type-add flag only applies to the current command. It does not add a new file type and save it somewhere in a persistent form. If you want a type to be available in every ripgrep command, then you should either create a shell alias:
alias rg="rg --type-add 'web:*.{html,css,js}'"or add --type-add=web:*.{html,css,js} to your ripgrep configuration file. (Configuration files are covered in more detail later.)
The special all file type
A special option supported by the --type flag is all. --type all looks for a match in any of the supported file types listed by --type-list, including those added on the command line using --type-add. It's equivalent to the command rg --type agda --type asciidoc --type asm ..., where ... stands for a list of --type flags for the rest of the types in --type-list.
As an example, let's suppose you have a shell script in your current directory, my-shell-script, which includes a shell library, my-shell-library.bash. Both rg --type sh and rg --type all would only search for matches in my-shell-library.bash, not my-shell-script, because the globs matched by the sh file type don't include files without an extension. On the other hand, rg --type-not all would search my-shell-script but not my-shell-library.bash.
Replacements
ripgrep provides a limited ability to modify its output by replacing matched text with some other text. This is easiest to explain with an example. Remember when we searched for the word fast in ripgrep's README?
$ rg fast README.md
75:  faster than both. (N.B. It is not, strictly speaking, a "drop-in" replacement
88:  color and full Unicode support. Unlike GNU grep, `ripgrep` stays fast while
119:### Is it really faster than everything else?
124:Summarizing, `ripgrep` is fast because:
129:  optimizations to make searching very fast.
What if we wanted to _replace_ all occurrences of fast with FAST? That's easy with ripgrep's --replace flag:
$ rg fast README.md --replace FAST
75:  FASTer than both. (N.B. It is not, strictly speaking, a "drop-in" replacement
88:  color and full Unicode support. Unlike GNU grep, `ripgrep` stays FAST while
119:### Is it really FASTer than everything else?
124:Summarizing, `ripgrep` is FAST because:
129:  optimizations to make searching very FAST.
or, more succinctly,
$ rg fast README.md -r FAST
[snip]
In essence, the --replace flag applies _only_ to the matching portion of text in the output. If you instead wanted to replace an entire line of text, then you need to include the entire line in your match. For example:
$ rg '^.*fast.*$' README.md -r FAST
75:FAST
88:FAST
119:FAST
124:FAST
129:FAST
Alternatively, you can combine the --only-matching (or -o for short) with the --replace flag to achieve the same result:
$ rg fast README.md --only-matching --replace FAST
75:FAST
88:FAST
119:FAST
124:FAST
129:FAST
or, more succinctly,
$ rg fast README.md -or FAST
[snip]
Finally, replacements can include capturing groups. For example, let's say we wanted to find all occurrences of fast followed by another word and join them together with a dash. The pattern we might use for that is fast\s+(\w+), which matches fast, followed by any amount of whitespace, followed by any number of "word" characters. We put the \w+ in a "capturing group" (indicated by parentheses) so that we can reference it later in our replacement string. For example:
$ rg 'fast\s+(\w+)' README.md -r 'fast-$1'
88:  color and full Unicode support. Unlike GNU grep, `ripgrep` stays fast-while
124:Summarizing, `ripgrep` is fast-because:
Our replacement string here, fast-$1, consists of fast- followed by the contents of the capturing group at index 1. (Capturing groups actually start at index 0, but the 0th capturing group always corresponds to the entire match. The capturing group at index 1 always corresponds to the first explicit capturing group found in the regex pattern.)
Capturing groups can also be named, which is sometimes more convenient than using the indices. For example, the following command is equivalent to the above command:
$ rg 'fast\s+(?P<word>\w+)' README.md -r 'fast-$word'
88:  color and full Unicode support. Unlike GNU grep, `ripgrep` stays fast-while
124:Summarizing, `ripgrep` is fast-because:
It is important to note that ripgrep will never modify your files. The --replace flag only controls ripgrep's output. (And there is no flag to let you do a replacement in a file.)
Configuration file
It is possible that ripgrep's default options aren't suitable in every case. For that reason, and because shell aliases aren't always convenient, ripgrep supports configuration files.
Setting up a configuration file is simple. ripgrep will not look in any predetermined directory for a config file automatically. Instead, you need to set the RIPGREP_CONFIG_PATH environment variable to the file path of your config file. Once the environment variable is set, open the file and just type in the flags you want set automatically. There are only two rules for describing the format of the config file:
1. Every line is a shell argument, after trimming whitespace. 2. Lines starting with # (optionally preceded by any amount of whitespace) are ignored.
In particular, there is no escaping. Each line is given to ripgrep as a single command line argument verbatim.
Here's an example of a configuration file, which demonstrates some of the formatting peculiarities:
$ cat $HOME/.ripgreprc
# Don't let ripgrep vomit really long lines to my terminal, and show a preview.
--max-columns=150
--max-columns-preview

# Add my 'web' type.
--type-add
web:*.{html,css,js}*

# Search hidden files / directories (e.g. dotfiles) by default
--hidden

# Using glob patterns to include/exclude files or folders
--glob=!.git/*

# or
--glob
!.git/*

# Set the colors.
--colors=line:none
--colors=line:style:bold

# Because who cares about case!?
--smart-case
When we use a flag that has a value, we either put the flag and the value on the same line but delimited by an = sign (e.g., --max-columns=150), or we put the flag and the value on two different lines. This is because ripgrep's argument parser knows to treat the single argument --max-columns=150 as a flag with a value, but if we had written --max-columns 150 in our configuration file, then ripgrep's argument parser wouldn't know what to do with it.
Putting the flag and value on different lines is exactly equivalent and is a matter of style.
Comments are encouraged so that you remember what the config is doing. Empty lines are OK too.
So let's say you're using the above configuration file, but while you're at a terminal, you really want to be able to see lines longer than 150 columns. What do you do? Thankfully, all you need to do is pass --max-columns 0 (or -M0 for short) on the command line, which will override your configuration file's setting. This works because ripgrep's configuration file is _prepended_ to the explicit arguments you give it on the command line. Since flags given later override flags given earlier, everything works as expected. This works for most other flags as well, and each flag's documentation states which other flags override it.
If you're confused about what configuration file ripgrep is reading arguments from, then running ripgrep with the --debug flag should help clarify things. The debug output should note what config file is being loaded and the arguments that have been read from the configuration.
Finally, if you want to make absolutely sure that ripgrep _isn't_ reading a configuration file, then you can pass the --no-config flag, which will always prevent ripgrep from reading extraneous configuration from the environment, regardless of what other methods of configuration are added to ripgrep in the future.
File encoding
Text encoding is a complex topic, but we can try to summarize its relevancy to ripgrep:
- Files are generally just a bundle of bytes. There is no reliable way to know
their encoding.
- Either the encoding of the pattern must match the encoding of the files being
searched, or a form of transcoding must be performed that converts either the pattern or the file to the same encoding as the other.
- ripgrep tends to work best on plain text files, and among plain text files,
the most popular encodings likely consist of ASCII, latin1 or UTF-8. As a special exception, UTF-16 is prevalent in Windows environments
In light of the above, here is how ripgrep behaves when --encoding auto is given, which is the default:
- All input is assumed to be ASCII compatible (which means every byte that
corresponds to an ASCII codepoint actually is an ASCII codepoint). This includes ASCII itself, latin1 and UTF-8.
- ripgrep works best with UTF-8. For example, ripgrep's regular expression
engine supports Unicode features. Namely, character classes like \w will match all word characters by Unicode's definition and . will match any Unicode codepoint instead of any byte. These constructions assume UTF-8, so they simply won't match when they come across bytes in a file that aren't UTF-8.
- To handle the UTF-16 case, ripgrep will do something called "BOM sniffing"
by default. That is, the first three bytes of a file will be read, and if they correspond to a UTF-16 BOM, then ripgrep will transcode the contents of the file from UTF-16 to UTF-8, and then execute the search on the transcoded version of the file. (This incurs a performance penalty since transcoding is needed in addition to regex searching.) If the file contains invalid UTF-16, then the Unicode replacement codepoint is substituted in place of invalid code units.
- To handle other cases, ripgrep provides a
-E/--encodingflag, which permits
you to specify an encoding from the Encoding Standard. ripgrep will assume _all_ files searched are the encoding specified (unless the file has a BOM) and will perform a transcoding step just like in the UTF-16 case described above.
By default, ripgrep will not require its input be valid UTF-8. That is, ripgrep can and will search arbitrary bytes. The key here is that if you're searching content that isn't UTF-8, then the usefulness of your pattern will degrade. If you're searching bytes that aren't ASCII compatible, then it's likely the pattern won't find anything. With all that said, this mode of operation is important, because it lets you find ASCII or UTF-8 _within_ files that are otherwise arbitrary bytes.
As a special case, the -E/--encoding flag supports the value none, which will completely disable all encoding related logic, including BOM sniffing. When -E/--encoding is set to none, ripgrep will search the raw bytes of the underlying file with no transcoding step. For example, here's how you might search the raw UTF-16 encoding of the string Шерлок:
$ rg '(?-u)\(\x045\x04@\x04;\x04>\x04:\x04' -E none -a some-utf16-fileOf course, that's just an example meant to show how one can drop down into raw bytes. Namely, the simpler command works as you might expect automatically:
$ rg 'Шерлок' some-utf16-fileFinally, it is possible to disable ripgrep's Unicode support from within the regular expression. For example, let's say you wanted . to match any byte rather than any Unicode codepoint. (You might want this while searching a binary file, since . by default will not match invalid UTF-8.) You could do this by disabling Unicode via a regular expression flag:
$ rg '(?-u:.)'This works for any part of the pattern. For example, the following will find any Unicode word character followed by any ASCII word character followed by another Unicode word character:
$ rg '\w(?-u:\w)\w'Binary data
In addition to skipping hidden files and files in your .gitignore by default, ripgrep also attempts to skip binary files. ripgrep does this by default because binary files (like PDFs or images) are typically not things you want to search when searching for regex matches. Moreover, if content in a binary file did match, then it's possible for undesirable binary data to be printed to your terminal and wreak havoc.
Unfortunately, unlike skipping hidden files and respecting your .gitignore rules, a file cannot as easily be classified as binary. In order to figure out whether a file is binary, the most effective heuristic that balances correctness with performance is to simply look for NUL bytes. At that point, the determination is simple: a file is considered "binary" if and only if it contains a NUL byte somewhere in its contents.
The issue is that while most binary files will have a NUL byte toward the beginning of its contents, this is not necessarily true. The NUL byte might be the very last byte in a large file, but that file is still considered binary. While this leads to a fair amount of complexity inside ripgrep's implementation, it also results in some unintuitive user experiences.
At a high level, ripgrep operates in three different modes with respect to binary files:
1. The default mode is to attempt to remove binary files from a search completely. This is meant to mirror how ripgrep removes hidden files and files in your .gitignore automatically. That is, as soon as a file is detected as binary, searching stops. If a match was already printed (because it was detected long before a NUL byte), then ripgrep will print a warning message indicating that the search stopped prematurely. This default mode only applies to files searched by ripgrep as a result of recursive directory traversal, which is consistent with ripgrep's other automatic filtering. For example, rg foo .file will search .file even though it is hidden. Similarly, rg foo binary-file will search binary-file in "binary" mode automatically. 2. Binary mode is similar to the default mode, except it will not always stop searching after it sees a NUL byte. Namely, in this mode, ripgrep will continue searching a file that is known to be binary until the first of two conditions is met: 1) the end of the file has been reached or 2) a match is or has been seen. This means that in binary mode, if ripgrep reports no matches, then there are no matches in the file. When a match does occur, ripgrep prints a message similar to one it prints when in its default mode indicating that the search has stopped prematurely. This mode can be forcefully enabled for all files with the --binary flag. The purpose of binary mode is to provide a way to discover matches in all files, but to avoid having binary data dumped into your terminal. 3. Text mode completely disables all binary detection and searches all files as if they were text. This is useful when searching a file that is predominantly text but contains a NUL byte, or if you are specifically trying to search binary data. This mode can be enabled with the -a/--text flag. Note that when using this mode on very large binary files, it is possible for ripgrep to use a lot of memory.
Unfortunately, there is one additional complexity in ripgrep that can make it difficult to reason about binary files. That is, the way binary detection works depends on the way that ripgrep searches your files. Specifically:
- When ripgrep uses memory maps, then binary detection is only performed on the
first few kilobytes of the file in addition to every matching line.
- When ripgrep doesn't use memory maps, then binary detection is performed on
all bytes searched.
This means that whether a file is detected as binary or not can change based on the internal search strategy used by ripgrep. If you prefer to keep ripgrep's binary file detection consistent, then you can disable memory maps via the --no-mmap flag. (The cost will be a small performance regression when searching very large files on some platforms.)
Preprocessor
In ripgrep, a preprocessor is any type of command that can be run to transform the input of every file before ripgrep searches it. This makes it possible to search virtually any kind of content that can be automatically converted to text without having to teach ripgrep how to read said content.
One common example is searching PDFs. PDFs are first and foremost meant to be displayed to users. But PDFs often have text streams in them that can be useful to search. In our case, we want to search Bruce Watson's excellent dissertation, Taxonomies and Toolkits of Regular Language Algorithms. After downloading it, let's try searching it:
$ rg 'The Commentz-Walter algorithm' 1995-watson.pdf
$
Surely, a dissertation on regular language algorithms would mention Commentz-Walter. Indeed it does, but our search isn't picking it up because PDFs are a binary format, and the text shown in the PDF may not be encoded as simple contiguous UTF-8. Namely, even passing the -a/--text flag to ripgrep will not make our search work.
One way to fix this is to convert the PDF to plain text first. This won't work well for all PDFs, but does great in a lot of cases. (Note that the tool we use, pdftotext, is part of the poppler PDF rendering library.)
$ pdftotext 1995-watson.pdf > 1995-watson.txt
$ rg 'The Commentz-Walter algorithm' 1995-watson.txt
316:The Commentz-Walter algorithms : : : : : : : : : : : : : : :
7165:4.4 The Commentz-Walter algorithms
10062:in input string S , we obtain the Boyer-Moore algorithm. The Commentz-Walter algorithm
17218:The Commentz-Walter algorithm (and its variants) displayed more interesting behaviour,
17249:Aho-Corasick algorithms are used extensively. The Commentz-Walter algorithms are used
17297: The Commentz-Walter algorithms (CW). In all versions of the CW algorithms, a common program skeleton is used with di erent shift functions. The CW algorithms are
But having to explicitly convert every file can be a pain, especially when you have a directory full of PDF files. Instead, we can use ripgrep's preprocessor feature to search the PDF. ripgrep's --pre flag works by taking a single command name and then executing that command for every file that it searches. ripgrep passes the file path as the first and only argument to the command and also sends the contents of the file to stdin. So let's write a simple shell script that wraps pdftotext in a way that conforms to this interface:
$ cat preprocess
#!/bin/sh

exec pdftotext - -
With preprocess in the same directory as 1995-watson.pdf, we can now use it to search the PDF:
$ rg --pre ./preprocess 'The Commentz-Walter algorithm' 1995-watson.pdf
316:The Commentz-Walter algorithms : : : : : : : : : : : : : : :
7165:4.4 The Commentz-Walter algorithms
10062:in input string S , we obtain the Boyer-Moore algorithm. The Commentz-Walter algorithm
17218:The Commentz-Walter algorithm (and its variants) displayed more interesting behaviour,
17249:Aho-Corasick algorithms are used extensively. The Commentz-Walter algorithms are used
17297: The Commentz-Walter algorithms (CW). In all versions of the CW algorithms, a common program skeleton is used with di erent shift functions. The CW algorithms are
Note that preprocess must be resolvable to a command that ripgrep can read. The simplest way to do this is to put your preprocessor command in a directory that is in your PATH (or equivalent), or otherwise use an absolute path.
As a bonus, this turns out to be quite a bit faster than other specialized PDF grepping tools:
$ time rg --pre ./preprocess 'The Commentz-Walter algorithm' 1995-watson.pdf -c
6

real    0.697
user    0.684
sys     0.007
maxmem  16 MB
faults  0

$ time pdfgrep 'The Commentz-Walter algorithm' 1995-watson.pdf -c
6

real    1.336
user    1.310
sys     0.023
maxmem  16 MB
faults  0
If you wind up needing to search a lot of PDFs, then ripgrep's parallelism can make the speed difference even greater.
A more robust preprocessor
One of the problems with the aforementioned preprocessor is that it will fail if you try to search a file that isn't a PDF:
$ echo foo > not-a-pdf
$ rg --pre ./preprocess 'The Commentz-Walter algorithm' not-a-pdf
not-a-pdf: preprocessor command failed: '"./preprocess" "not-a-pdf"':
-------------------------------------------------------------------------------
Syntax Warning: May not be a PDF file (continuing anyway)
Syntax Error: Couldn't find trailer dictionary
Syntax Error: Couldn't find trailer dictionary
Syntax Error: Couldn't read xref table
To fix this, we can make our preprocessor script a bit more robust by only running pdftotext when we think the input is a non-empty PDF:
$ cat preprocessor
#!/bin/sh

case "$1" in
*.pdf)
  # The -s flag ensures that the file is non-empty.
  if [ -s "$1" ]; then
    exec pdftotext - -
  else
    exec cat
  fi
  ;;
*)
  exec cat
  ;;
esac
We can even extend our preprocessor to search other kinds of files. Sometimes we don't always know the file type from the file name, so we can use the file utility to "sniff" the type of the file based on its contents:
$ cat processor
#!/bin/sh

case "$1" in
*.pdf)
  # The -s flag ensures that the file is non-empty.
  if [ -s "$1" ]; then
    exec pdftotext - -
  else
    exec cat
  fi
  ;;
*)
  case $(file "$1") in
  *Zstandard*)
    exec pzstd -cdq
    ;;
  *)
    exec cat
    ;;
  esac
  ;;
esac
Reducing preprocessor overhead
There is one more problem with the above approach: it requires running a preprocessor for every single file that ripgrep searches. If every file needs a preprocessor, then this is OK. But if most don't, then this can substantially slow down searches because of the overhead of launching new processors. You can avoid this by telling ripgrep to only invoke the preprocessor when the file path matches a glob. For example, consider the performance difference even when searching a repository as small as ripgrep's:
$ time rg --pre pre-rg 'fn is_empty' -c
crates/globset/src/lib.rs:1
crates/matcher/src/lib.rs:2
crates/ignore/src/overrides.rs:1
crates/ignore/src/gitignore.rs:1
crates/ignore/src/types.rs:1

real    0.138
user    0.485
sys     0.209
maxmem  7 MB
faults  0

$ time rg --pre pre-rg --pre-glob '*.pdf' 'fn is_empty' -c
crates/globset/src/lib.rs:1
crates/ignore/src/types.rs:1
crates/ignore/src/gitignore.rs:1
crates/ignore/src/overrides.rs:1
crates/matcher/src/lib.rs:2

real    0.008
user    0.010
sys     0.002
maxmem  7 MB
faults  0
Common options
ripgrep has a lot of flags. Too many to keep in your head at once. This section is intended to give you a sampling of some of the most important and frequently used options that will likely impact how you use ripgrep on a regular basis.
-h: Show ripgrep's condensed help output.--help: Show ripgrep's longer form help output. (Nearly what you'd find in
ripgrep's man page, so pipe it into a pager!)
-i/--ignore-case: When searching for a pattern, ignore case differences.
That is rg -i fast matches fast, fASt, FAST, etc.
-S/--smart-case: This is similar to--ignore-case, but disables itself
if the pattern contains any uppercase letters. Usually this flag is put into alias or a config file.
-F/--fixed-strings: Disable regular expression matching and treat the pattern
as a literal string.
-w/--word-regexp: Require that all matches of the pattern be surrounded
by word boundaries. That is, given pattern, the --word-regexp flag will cause ripgrep to behave as if pattern were actually \b(?:pattern)\b.
-c/--count: Report a count of total matched lines.--files: Print the files that ripgrep _would_ search, but don't actually
search them.
-a/--text: Search binary files as if they were plain text.-U/--multiline: Permit matches to span multiple lines.-z/--search-zip: Search compressed files (gzip, bzip2, lzma, xz, lz4,
brotli, zstd). This is disabled by default.
-C/--context: Show the lines surrounding a match.--sort path: Force ripgrep to sort its output by file name. (This disables
parallelism, so it might be slower.)
-L/--follow: Follow symbolic links while recursively searching.-M/--max-columns: Limit the length of lines printed by ripgrep.--debug: Shows ripgrep's debug output. This is useful for understanding
why a particular file might be ignored from search, or what kinds of configuration ripgrep is loading from the environment.
ripgrep (rg)
ripgrep is a line-oriented search tool that recursively searches the current directory for a regex pattern. By default, ripgrep will respect gitignore rules and automatically skip hidden files/directories and binary files. (To disable all automatic filtering by default, use rg -uuu.) ripgrep has first class support on Windows, macOS and Linux, with binary downloads available for every release. ripgrep is similar to other popular search tools like The Silver Searcher, ack and grep.
  
Dual-licensed under MIT or the UNLICENSE.
CHANGELOG
Please see the CHANGELOG for a release history.
Documentation quick links
- Installation
- User Guide
- Frequently Asked Questions
- Regex syntax
- Configuration files
- Shell completions
- Building
- Translations
Screenshot of search results
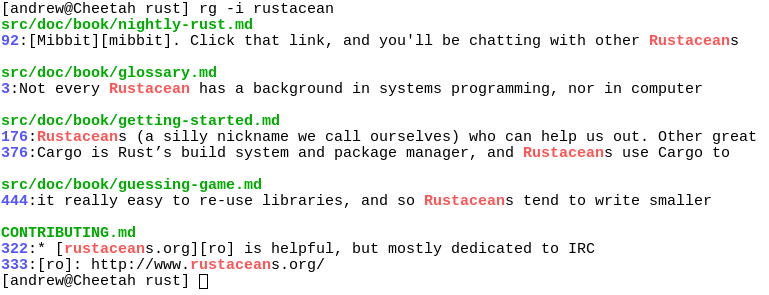
Quick examples comparing tools
This example searches the entire Linux kernel source tree (after running make defconfig && make -j8) for [A-Z]+_SUSPEND, where all matches must be words. Timings were collected on a system with an Intel i9-12900K 5.2 GHz.
Please remember that a single benchmark is never enough! See my blog post on ripgrep for a very detailed comparison with more benchmarks and analysis.
| Tool | Command | Line count | Time |
|---|---|---|---|
| ripgrep (Unicode) | rg -n -w '[A-Z]+_SUSPEND' | 536 | 0.082s (1.00x) |
| hypergrep | hgrep -n -w '[A-Z]+_SUSPEND' | 536 | 0.167s (2.04x) |
| git grep | git grep -P -n -w '[A-Z]+_SUSPEND' | 536 | 0.273s (3.34x) |
| The Silver Searcher | ag -w '[A-Z]+_SUSPEND' | 534 | 0.443s (5.43x) |
| ugrep | ugrep -r --ignore-files --no-hidden -I -w '[A-Z]+_SUSPEND' | 536 | 0.639s (7.82x) |
| git grep | LC_ALL=C git grep -E -n -w '[A-Z]+_SUSPEND' | 536 | 0.727s (8.91x) |
| git grep (Unicode) | LC_ALL=en_US.UTF-8 git grep -E -n -w '[A-Z]+_SUSPEND' | 536 | 2.670s (32.70x) |
| ack | ack -w '[A-Z]+_SUSPEND' | 2677 | 2.935s (35.94x) |
Here's another benchmark on the same corpus as above that disregards gitignore files and searches with a whitelist instead. The corpus is the same as in the previous benchmark, and the flags passed to each command ensure that they are doing equivalent work:
| Tool | Command | Line count | Time |
|---|---|---|---|
| ripgrep | rg -uuu -tc -n -w '[A-Z]+_SUSPEND' | 447 | 0.063s (1.00x) |
| ugrep | ugrep -r -n --include='*.c' --include='*.h' -w '[A-Z]+_SUSPEND' | 447 | 0.607s (9.62x) |
| GNU grep | grep -E -r -n --include='*.c' --include='*.h' -w '[A-Z]+_SUSPEND' | 447 | 0.674s (10.69x) |
Now we'll move to searching on single large file. Here is a straight-up comparison between ripgrep, ugrep and GNU grep on a file cached in memory (~13GB, `OpenSubtitles.raw.en.gz`, decompressed):
| Tool | Command | Line count | Time |
|---|---|---|---|
| ripgrep (Unicode) | rg -w 'Sherlock [A-Z]\w+' | 7882 | 1.042s (1.00x) |
| ugrep | ugrep -w 'Sherlock [A-Z]\w+' | 7882 | 1.339s (1.28x) |
| GNU grep (Unicode) | LC_ALL=en_US.UTF-8 egrep -w 'Sherlock [A-Z]\w+' | 7882 | 6.577s (6.31x) |
In the above benchmark, passing the -n flag (for showing line numbers) increases the times to 1.664s for ripgrep and 9.484s for GNU grep. ugrep times are unaffected by the presence or absence of -n.
Beware of performance cliffs though:
| Tool | Command | Line count | Time |
|---|---|---|---|
| ripgrep (Unicode) | rg -w '[A-Z]\w+ Sherlock [A-Z]\w+' | 485 | 1.053s (1.00x) |
| GNU grep (Unicode) | LC_ALL=en_US.UTF-8 grep -E -w '[A-Z]\w+ Sherlock [A-Z]\w+' | 485 | 6.234s (5.92x) |
| ugrep | ugrep -w '[A-Z]\w+ Sherlock [A-Z]\w+' | 485 | 28.973s (27.51x) |
And performance can drop precipitously across the board when searching big files for patterns without any opportunities for literal optimizations:
| Tool | Command | Line count | Time |
|---|---|---|---|
| ripgrep | rg '[A-Za-z]{30}' | 6749 | 15.569s (1.00x) |
| ugrep | ugrep -E '[A-Za-z]{30}' | 6749 | 21.857s (1.40x) |
| GNU grep | LC_ALL=C grep -E '[A-Za-z]{30}' | 6749 | 32.409s (2.08x) |
| GNU grep (Unicode) | LC_ALL=en_US.UTF-8 grep -E '[A-Za-z]{30}' | 6795 | 8m30s (32.74x) |
Finally, high match counts also tend to both tank performance and smooth out the differences between tools (because performance is dominated by how quickly one can handle a match and not the algorithm used to detect the match, generally speaking):
| Tool | Command | Line count | Time |
|---|---|---|---|
| ripgrep | rg the | 83499915 | 6.948s (1.00x) |
| ugrep | ugrep the | 83499915 | 11.721s (1.69x) |
| GNU grep | LC_ALL=C grep the | 83499915 | 15.217s (2.19x) |
Why should I use ripgrep?
- It can replace many use cases served by other search tools
because it contains most of their features and is generally faster. (See the FAQ for more details on whether ripgrep can truly replace grep.)
- Like other tools specialized to code search, ripgrep defaults to
recursive search and does automatic filtering. Namely, ripgrep won't search files ignored by your .gitignore/.ignore/.rgignore files, it won't search hidden files and it won't search binary files. Automatic filtering can be disabled with rg -uuu.
- ripgrep can search specific types of files.
For example, rg -tpy foo limits your search to Python files and rg -Tjs foo excludes JavaScript files from your search. ripgrep can be taught about new file types with custom matching rules.
- ripgrep supports many features found in
grep, such as showing the context
of search results, searching multiple patterns, highlighting matches with color and full Unicode support. Unlike GNU grep, ripgrep stays fast while supporting Unicode (which is always on).
- ripgrep has optional support for switching its regex engine to use PCRE2.
Among other things, this makes it possible to use look-around and backreferences in your patterns, which are not supported in ripgrep's default regex engine. PCRE2 support can be enabled with -P/--pcre2 (use PCRE2 always) or --auto-hybrid-regex (use PCRE2 only if needed). An alternative syntax is provided via the --engine (default|pcre2|auto) option.
- ripgrep has rudimentary support for replacements,
which permit rewriting output based on what was matched.
- ripgrep supports searching files in text encodings
other than UTF-8, such as UTF-16, latin-1, GBK, EUC-JP, Shift_JIS and more. (Some support for automatically detecting UTF-16 is provided. Other text encodings must be specifically specified with the -E/--encoding flag.)
- ripgrep supports searching files compressed in a common format (brotli,
bzip2, gzip, lz4, lzma, xz, or zstandard) with the -z/--search-zip flag.
- ripgrep supports
arbitrary input preprocessing filters which could be PDF text extraction, less supported decompression, decrypting, automatic encoding detection and so on.
- ripgrep can be configured via a
configuration file.
In other words, use ripgrep if you like speed, filtering by default, fewer bugs and Unicode support.
Why shouldn't I use ripgrep?
Despite initially not wanting to add every feature under the sun to ripgrep, over time, ripgrep has grown support for most features found in other file searching tools. This includes searching for results spanning across multiple lines, and opt-in support for PCRE2, which provides look-around and backreference support.
At this point, the primary reasons not to use ripgrep probably consist of one or more of the following:
- You need a portable and ubiquitous tool. While ripgrep works on Windows,
macOS and Linux, it is not ubiquitous and it does not conform to any standard such as POSIX. The best tool for this job is good old grep.
- There still exists some other feature (or bug) not listed in this README that
you rely on that's in another tool that isn't in ripgrep.
- There is a performance edge case where ripgrep doesn't do well where another
tool does do well. (Please file a bug report!)
- ripgrep isn't possible to install on your machine or isn't available for your
platform. (Please file a bug report!)
Is it really faster than everything else?
Generally, yes. A large number of benchmarks with detailed analysis for each is available on my blog.
Summarizing, ripgrep is fast because:
- It is built on top of
Rust's regex engine. Rust's regex engine uses finite automata, SIMD and aggressive literal optimizations to make searching very fast. (PCRE2 support can be opted into with the -P/--pcre2 flag.)
- Rust's regex library maintains performance with full Unicode support by
building UTF-8 decoding directly into its deterministic finite automaton engine.
- It supports searching with either memory maps or by searching incrementally
with an intermediate buffer. The former is better for single files and the latter is better for large directories. ripgrep chooses the best searching strategy for you automatically.
- Applies your ignore patterns in
.gitignorefiles using a
`RegexSet`. That means a single file path can be matched against multiple glob patterns simultaneously.
- It uses a lock-free parallel recursive directory iterator, courtesy of
`crossbeam` and `ignore`.
Feature comparison
Andy Lester, author of ack, has published an excellent table comparing the features of ack, ag, git-grep, GNU grep and ripgrep: https://beyondgrep.com/feature-comparison/
Note that ripgrep has grown a few significant new features recently that are not yet present in Andy's table. This includes, but is not limited to, configuration files, passthru, support for searching compressed files, multiline search and opt-in fancy regex support via PCRE2.
Playground
If you'd like to try ripgrep before installing, there's an unofficial playground and an interactive tutorial.
If you have any questions about these, please open an issue in the tutorial repo.
Installation
The binary name for ripgrep is rg.
[Archives of precompiled binaries for ripgrep are available for Windows, macOS and Linux.](https://github.com/BurntSushi/ripgrep/releases) Linux and Windows binaries are static executables. Users of platforms not explicitly mentioned below are advised to download one of these archives.
If you're a macOS Homebrew or a Linuxbrew user, then you can install ripgrep from homebrew-core:
$ brew install ripgrepIf you're a MacPorts user, then you can install ripgrep from the official ports:
$ sudo port install ripgrepIf you're a Windows Chocolatey user, then you can install ripgrep from the official repo:
$ choco install ripgrepIf you're a Windows Scoop user, then you can install ripgrep from the official bucket:
$ scoop install ripgrepIf you're a Windows Winget user, then you can install ripgrep from the winget-pkgs repository:
$ winget install BurntSushi.ripgrep.MSVCIf you're an Arch Linux user, then you can install ripgrep from the official repos:
$ sudo pacman -S ripgrepIf you're a Gentoo user, you can install ripgrep from the official repo:
$ sudo emerge sys-apps/ripgrepIf you're a Fedora user, you can install ripgrep from official repositories.
$ sudo dnf install ripgrepIf you're an openSUSE user, ripgrep is included in openSUSE Tumbleweed and openSUSE Leap since 15.1.
$ sudo zypper install ripgrepIf you're a CentOS Stream 10 user, you can install ripgrep from the EPEL repository:
$ sudo dnf config-manager --set-enabled crb
$ sudo dnf install https://dl.fedoraproject.org/pub/epel/epel-release-latest-10.noarch.rpm
$ sudo dnf install ripgrep
If you're a Red Hat 10 user, you can install ripgrep from the EPEL repository:
$ sudo subscription-manager repos --enable codeready-builder-for-rhel-10-$(arch)-rpms
$ sudo dnf install https://dl.fedoraproject.org/pub/epel/epel-release-latest-10.noarch.rpm
$ sudo dnf install ripgrep
If you're a Rocky Linux 10 user, you can install ripgrep from the EPEL repository:
$ sudo dnf install https://dl.fedoraproject.org/pub/epel/epel-release-latest-10.noarch.rpm
$ sudo dnf install ripgrep
If you're a Nix user, you can install ripgrep from nixpkgs:
$ nix-env --install ripgrepIf you're a Flox user, you can install ripgrep as follows:
$ flox install ripgrepIf you're a Guix user, you can install ripgrep from the official package collection:
$ guix install ripgrepIf you're a Debian user (or a user of a Debian derivative like Ubuntu), then ripgrep can be installed using a binary .deb file provided in each ripgrep release.
$ curl -LO https://github.com/BurntSushi/ripgrep/releases/download/14.1.1/ripgrep_14.1.1-1_amd64.deb
$ sudo dpkg -i ripgrep_14.1.1-1_amd64.deb
If you run Debian stable, ripgrep is officially maintained by Debian, although its version may be older than the deb package available in the previous step.
$ sudo apt-get install ripgrepIf you're an Ubuntu Cosmic (18.10) (or newer) user, ripgrep is available using the same packaging as Debian:
$ sudo apt-get install ripgrep(N.B. Various snaps for ripgrep on Ubuntu are also available, but none of them seem to work right and generate a number of very strange bug reports that I don't know how to fix and don't have the time to fix. Therefore, it is no longer a recommended installation option.)
If you're an ALT user, you can install ripgrep from the official repo:
$ sudo apt-get install ripgrepIf you're a FreeBSD user, then you can install ripgrep from the official ports:
$ sudo pkg install ripgrepIf you're an OpenBSD user, then you can install ripgrep from the official ports:
$ doas pkg_add ripgrepIf you're a NetBSD user, then you can install ripgrep from pkgsrc:
$ sudo pkgin install ripgrepIf you're a Haiku x86_64 user, then you can install ripgrep from the official ports:
$ sudo pkgman install ripgrepIf you're a Haiku x86_gcc2 user, then you can install ripgrep from the same port as Haiku x86_64 using the x86 secondary architecture build:
$ sudo pkgman install ripgrep_x86If you're a Void Linux user, then you can install ripgrep from the official repository:
$ sudo xbps-install -Syv ripgrepIf you're a Rust programmer, ripgrep can be installed with cargo.
- Note that the minimum supported version of Rust for ripgrep is 1.85.0,
although ripgrep may work with older versions.
- Note that the binary may be bigger than expected because it contains debug
symbols. This is intentional. To remove debug symbols and therefore reduce the file size, run strip on the binary.
$ cargo install ripgrepAlternatively, one can use `cargo binstall` to install a ripgrep binary directly from GitHub:
$ cargo binstall ripgrepBuilding
ripgrep is written in Rust, so you'll need to grab a Rust installation in order to compile it. ripgrep compiles with Rust 1.85.0 (stable) or newer. In general, ripgrep tracks the latest stable release of the Rust compiler.
To build ripgrep:
$ git clone https://github.com/BurntSushi/ripgrep
$ cd ripgrep
$ cargo build --release
$ ./target/release/rg --version
0.1.3
NOTE: In the past, ripgrep supported a simd-accel Cargo feature when using a Rust nightly compiler. This only benefited UTF-16 transcoding. Since it required unstable features, this build mode was prone to breakage. Because of that, support for it has been removed. If you want SIMD optimizations for UTF-16 transcoding, then you'll have to petition the `encoding_rs` project to use stable APIs.
Finally, optional PCRE2 support can be built with ripgrep by enabling the pcre2 feature:
$ cargo build --release --features 'pcre2'Enabling the PCRE2 feature works with a stable Rust compiler and will attempt to automatically find and link with your system's PCRE2 library via pkg-config. If one doesn't exist, then ripgrep will build PCRE2 from source using your system's C compiler and then statically link it into the final executable. Static linking can be forced even when there is an available PCRE2 system library by either building ripgrep with the MUSL target or by setting PCRE2_SYS_STATIC=1.
ripgrep can be built with the MUSL target on Linux by first installing the MUSL library on your system (consult your friendly neighborhood package manager). Then you just need to add MUSL support to your Rust toolchain and rebuild ripgrep, which yields a fully static executable:
$ rustup target add x86_64-unknown-linux-musl
$ cargo build --release --target x86_64-unknown-linux-musl
Applying the --features flag from above works as expected. If you want to build a static executable with MUSL and with PCRE2, then you will need to have musl-gcc installed, which might be in a separate package from the actual MUSL library, depending on your Linux distribution.
Running tests
ripgrep is relatively well-tested, including both unit tests and integration tests. To run the full test suite, use:
$ cargo test --allfrom the repository root.
Related tools
- delta is a syntax highlighting
pager that supports the rg --json output format. So all you need to do to make it work is rg --json pattern | delta. See delta's manual section on grep for more details.
Vulnerability reporting
For reporting a security vulnerability, please contact Andrew Gallant. The contact page has my email address and PGP public key if you wish to send an encrypted message.
Translations
The following is a list of known translations of ripgrep's documentation. These are unofficially maintained and may not be up to date.
Research Requirements
- Use Exa first for current best practices.
- Use WebFetch/arXiv fallback when Exa is insufficient.
- Capture constraints and map them to hooks/rules/schemas/workflows.
ripgrep Rules
Purpose
Enhanced code search with custom ripgrep binary supporting ES module extensions and advanced patterns.
Best Practices
- Follow established patterns
- Validate inputs at boundaries
Integration Points
See SKILL.md for complete documentation.
{
  "$schema": "http://json-schema.org/draft-07/schema#",
  "title": "ripgrepInput",
  "description": "Input schema for Enhanced code search with custom ripgrep binary supporting ES module extensions and advanced patterns.",
  "type": "object",
  "additionalProperties": true,
  "properties": {
    "target": {
      "type": "string",
      "description": "Target file or path for the skill to operate on"
    },
    "options": {
      "type": "object",
      "description": "Additional options for skill execution",
      "additionalProperties": true
    }
  }
}
{
  "$schema": "http://json-schema.org/draft-07/schema#",
  "title": "ripgrepOutput",
  "type": "object",
  "additionalProperties": true,
  "properties": {
    "ok": {
      "type": "boolean"
    },
    "summary": {
      "type": "string"
    }
  }
}
'use strict';

function main(input = {}) {
  return { ok: true, skill: 'ripgrep', input };
}

module.exports = { main };
#!/usr/bin/env node
/**
 * Quick Search Presets for Ripgrep
 * =================================
 *
 * Provides preset-based searches for common patterns.
 *
 * Usage:
 *   node quick-search.mjs <preset> "pattern" [extra-options]
 *
 * Presets:
 *   js       - JavaScript files (.js, .mjs, .cjs)
 *   ts       - TypeScript files (.ts, .mts, .cts)
 *   mjs      - ES modules only (.mjs)
 *   cjs      - CommonJS modules only (.cjs)
 *   hooks    - .claude/hooks/ directory
 *   skills   - .claude/skills/ directory
 *   tools    - .claude/tools/ directory
 *   agents   - .claude/agents/ directory
 *   all      - All files (no filter)
 *
 * Examples:
 *   node quick-search.mjs js "function"
 *   node quick-search.mjs hooks "PreToolUse"
 *   node quick-search.mjs ts "interface" -i
 */

import { spawn } from 'child_process';
import { fileURLToPath } from 'url';
import path from 'path';
import fs from 'fs';
import { createRequire } from 'module';

const require = createRequire(import.meta.url);
const { resolveRipgrepBinary } = require('../../../lib/utils/binary-resolver.cjs');

const __filename = fileURLToPath(import.meta.url);
const __dirname = path.dirname(__filename);

// Find project root (where .claude folder is)
function findProjectRoot() {
  let dir = __dirname;
  while (dir !== path.parse(dir).root) {
    if (fs.existsSync(path.join(dir, '.claude'))) {
      return dir;
    }
    if (path.basename(dir) === '.claude') {
      return path.dirname(dir);
    }
    dir = path.dirname(dir);
  }
  return process.cwd();
}

const PROJECT_ROOT = findProjectRoot();

// Get ripgrep binary path from @vscode/ripgrep npm package
let vscodeRgPath = null;
try {
  const { rgPath: npmRgPath } = require('@vscode/ripgrep');
  vscodeRgPath = npmRgPath;
} catch (_err) {
  // Continue with resolver fallbacks (Scoop shims / node_modules/.bin / PATH).
}

const rgPath = resolveRipgrepBinary({
  projectRoot: PROJECT_ROOT,
  preferredPath: process.env.RG_BIN,
  vscodeRgPath,
});

if (!rgPath) {
  console.error('❌ Unable to resolve ripgrep binary.');
  console.error('   Install @vscode/ripgrep or ensure rg is available (Scoop/PATH).');
  process.exit(1);
}

// Optional: Check for .ripgreprc config file (backward compatibility)
const RIPGREPRC = path.join(PROJECT_ROOT, 'bin', '.ripgreprc');
const configExists = fs.existsSync(RIPGREPRC);

// Parse arguments
const args = process.argv.slice(2);

if (args.length < 2) {
  console.error('Usage: node quick-search.mjs <preset> "pattern" [extra-options]');
  console.error('');
  console.error('Presets:');
  console.error('  js       - JavaScript files (.js, .mjs, .cjs)');
  console.error('  ts       - TypeScript files (.ts, .mts, .cts)');
  console.error('  mjs      - ES modules only (.mjs)');
  console.error('  cjs      - CommonJS modules only (.cjs)');
  console.error('  hooks    - .claude/hooks/ directory');
  console.error('  skills   - .claude/skills/ directory');
  console.error('  tools    - .claude/tools/ directory');
  console.error('  agents   - .claude/agents/ directory');
  console.error('  all      - All files (no filter)');
  console.error('');
  console.error('Examples:');
  console.error('  node quick-search.mjs js "function"');
  console.error('  node quick-search.mjs hooks "PreToolUse"');
  console.error('  node quick-search.mjs ts "interface" -i');
  process.exit(1);
}

const preset = args[0];
const pattern = args[1];
const extraArgs = args.slice(2);

// Map presets to ripgrep arguments
const presets = {
  js: ['-tjs'],
  ts: ['-tts'],
  mjs: ['-g', '*.mjs'],
  cjs: ['-g', '*.cjs'],
  mts: ['-g', '*.mts'],
  cts: ['-g', '*.cts'],
  hooks: ['-g', '.claude/hooks/**'],
  skills: ['-g', '.claude/skills/**'],
  tools: ['-g', '.claude/tools/**'],
  agents: ['-g', '.claude/agents/**'],
  all: [],
};

if (!presets[preset]) {
  console.error(`❌ Unknown preset: ${preset}`);
  console.error('   Valid presets: ' + Object.keys(presets).join(', '));
  process.exit(1);
}

// Build final args: [pattern, ...preset-args, ...extra-args]
// Note: `.claude/`-prefixed paths are treated as "hidden" by ripgrep, so include `--hidden`
// to make presets like `hooks`, `skills`, etc. work by default.
const rgArgs = ['--hidden', ...presets[preset], ...extraArgs, pattern];

// Set environment variable for config if it exists
const env = {
  ...process.env,
};
if (configExists) {
  env.RIPGREP_CONFIG_PATH = RIPGREPRC;
}

// Spawn ripgrep
const rg = spawn(rgPath, rgArgs, {
  stdio: 'inherit',
  env,
  shell: false, // SECURITY: Prevent shell interpretation
  windowsHide: true,
});

rg.on('error', error => {
  console.error(`❌ Failed to execute ripgrep: ${error.message}`);
  process.exit(1);
});

rg.on('close', code => {
  process.exit(code);
});
#!/usr/bin/env node
/**
 * Ripgrep Search Wrapper
 * ======================
 *
 * Uses @vscode/ripgrep npm package for cross-platform ripgrep binary.
 * Optionally uses .ripgreprc config file if present.
 *
 * Usage:
 *   node search.mjs "pattern" [options]
 *   node search.mjs "pattern" -tjs
 *   node search.mjs "pattern" -i -C 3
 */

import { spawn } from 'child_process';
import { fileURLToPath } from 'url';
import path from 'path';
import fs from 'fs';
import { createRequire } from 'module';

const require = createRequire(import.meta.url);
const { resolveRipgrepBinary } = require('../../../lib/utils/binary-resolver.cjs');

const __filename = fileURLToPath(import.meta.url);
const __dirname = path.dirname(__filename);

// Find project root (where .claude folder is)
function findProjectRoot() {
  let dir = __dirname;
  while (dir !== path.parse(dir).root) {
    if (fs.existsSync(path.join(dir, '.claude'))) {
      return dir;
    }
    if (path.basename(dir) === '.claude') {
      return path.dirname(dir);
    }
    dir = path.dirname(dir);
  }
  return process.cwd();
}

const PROJECT_ROOT = findProjectRoot();

// Get ripgrep binary path from @vscode/ripgrep npm package
let vscodeRgPath = null;
try {
  const { rgPath: npmRgPath } = require('@vscode/ripgrep');
  vscodeRgPath = npmRgPath;
} catch (_err) {
  // Continue with resolver fallbacks (Scoop shims / node_modules/.bin / PATH).
}

const rgPath = resolveRipgrepBinary({
  projectRoot: PROJECT_ROOT,
  preferredPath: process.env.RG_BIN,
  vscodeRgPath,
});

if (!rgPath) {
  console.error('❌ Unable to resolve ripgrep binary.');
  console.error('   Install @vscode/ripgrep or ensure rg is available (Scoop/PATH).');
  process.exit(1);
}

// Optional: Check for .ripgreprc config file (backward compatibility)
const RIPGREPRC = path.join(PROJECT_ROOT, 'bin', '.ripgreprc');
const configExists = fs.existsSync(RIPGREPRC);

// Get search pattern and args from command line
const args = process.argv.slice(2);

if (args.length === 0) {
  console.error('Usage: node search.mjs "pattern" [options]');
  console.error('');
  console.error('Examples:');
  console.error('  node search.mjs "function" -tjs');
  console.error('  node search.mjs "TaskUpdate" -tjs -tts');
  console.error('  node search.mjs "pattern" -i -C 3');
  process.exit(1);
}

// Set environment variable for config if it exists
const env = {
  ...process.env,
};
if (configExists) {
  env.RIPGREP_CONFIG_PATH = RIPGREPRC;
}

// Spawn ripgrep with all args passed through
const rg = spawn(rgPath, args, {
  stdio: 'inherit',
  env,
  shell: false, // SECURITY: Prevent shell interpretation
  windowsHide: true,
});

rg.on('error', error => {
  console.error(`❌ Failed to execute ripgrep: ${error.message}`);
  process.exit(1);
});

rg.on('close', code => {
  process.exit(code);
});
ripgrep Implementation Template
Goal
- Define target outcome and acceptance criteria.
TDD
1. Red 2. Green 3. Refactor
Verification
- lint
- format
- targeted tests
Related skills
 Setup Matt Pocock SkillsScaffold the per-repo configuration that Matt Pocock’s engineering agent skills rely on so they understand the issue tracker, triage labels, and domain documentation la495k196k
 Lark AppsConnect Claude, Cursor or custom agents directly to Lark (Feishu) for messaging, document automation, approval workflows and enterprise data access.402k
 CavemanSlash token usage by roughly 75% while keeping every technical detail intact when working with Claude Code, Cursor or similar agents.391k94.7k
 Lark Skill MakerQuickly turn any Lark/Feishu OpenAPI call or multi-step workflow into a reusable agent skill with its own SKILL.md.386k16k
 Running Claude Code Via Litellm CopilotRun Claude Code at a fraction of the cost by routing requests through LiteLLM to the GitHub Copilot Chat API.270k72
 Codex PetGenerate a complete Codex Pet spritesheet and metadata from one reference image without needing an OpenAI key or Codex Pro.246k10